
Chain Link Fence Installation: A Comprehensive Guide
Discover a 67-page PDF guide detailing chain link fence installation, alongside specifications and a step-by-step process for accurate, DIY fencing projects.
Understanding Chain Link Fence Components
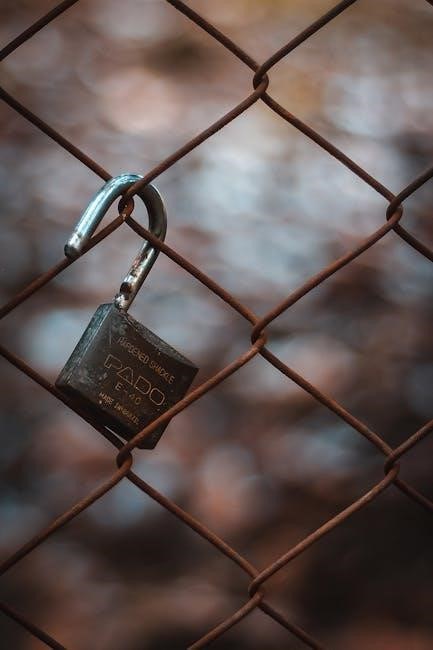
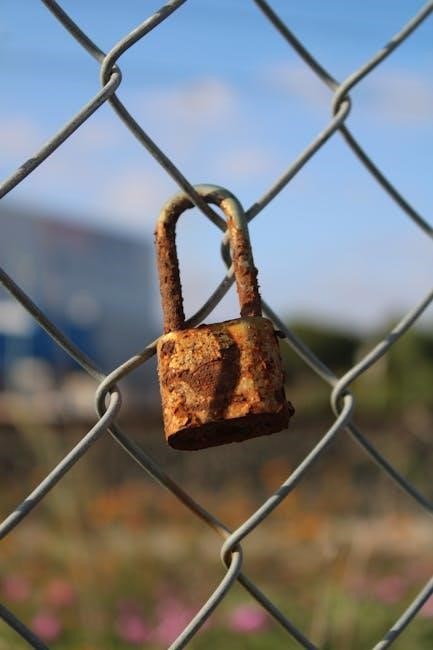
A successful chain link fence relies on understanding its core components. Detailed schematics, found within installation guides like the 67-page PDF, illustrate these parts. Key elements include terminal posts, line posts, and top rail, forming the structural framework. The chain link fabric itself, available in various gauges and coatings, provides the security barrier.
Essential accessories like tension wire, brace bands, and fence caps contribute to stability and longevity. PDF resources often showcase these components, clarifying their function within the overall system. Proper identification of each part is crucial for a correct and durable installation, ensuring a secure perimeter.
Types of Chain Link Fabric & Coatings
Chain link fabric comes in diverse options, detailed in comprehensive PDF installation guides. Galvanized steel is standard, offering corrosion resistance, while PVC-coated fabric provides enhanced durability and aesthetics. Wire gauges – typically 9, 11, or 12.5 – dictate strength; lower numbers mean thicker wire.
Mesh sizes vary, impacting security and visibility. PT. Maccaferri Indonesia’s product details, often found in these guides, highlight specific coating types and their benefits. Choosing the right fabric and coating depends on environmental factors and desired longevity, ensuring a lasting and effective fence.
Choosing the Right Gauge & Height
PDF installation guides emphasize selecting the appropriate wire gauge and fence height. Gauge, ranging from 9 to 12.5, determines strength – lower is heavier duty. Height depends on security needs and local regulations; common options include 4, 5, and 6 feet.
Maccaferri Indonesia product details within these guides specify suitable gauges for various applications. Consider factors like terrain, potential impact, and privacy requirements. Proper selection ensures the fence withstands stress and meets intended purposes, maximizing investment and longevity.

Planning Your Chain Link Fence Installation
PDF guides stress verifying property lines, checking local regulations, and carefully planning fence layout, including gate placement, before beginning installation.
Property Line Verification & Local Regulations
Before commencing any chain link fence project, crucially verify your property lines to avoid disputes with neighbors. PDF installation guides emphasize this initial step. Thoroughly research local regulations and homeowner association rules regarding fence height, materials, and setback requirements.
Permits may be necessary, and failing to comply with local ordinances can result in fines or the need to remove the fence; Detailed guides often suggest contacting your local building department for clarification. Understanding these regulations prior to installation ensures a smooth and legally compliant process, saving potential headaches and expenses later on.
Fence Layout & Gate Placement
Careful planning of your fence layout is essential, as PDF guides highlight. Mark the fence line using stones and rope, ensuring a straight path. Strategically position gates for convenient access, considering pedestrian and vehicular traffic flow. Installation guides often recommend planning for future access needs.
Consider the swing direction of gates and ensure sufficient space for opening and closing. Detailed schematics within PDF resources illustrate optimal gate placement. Proper layout minimizes obstructions and maximizes the functionality of your chain link fence system, enhancing both security and usability.
Tools & Materials Checklist
Comprehensive PDF installation guides emphasize a thorough checklist. Essential tools include post hole diggers, concrete mixers, levels, measuring tapes, and wire cutters. Materials needed encompass chain link fabric, terminal posts, line posts, top rail, tension wire, gate components, and concrete mix.
Don’t forget fence caps and accessories for finishing touches. Product details from manufacturers like Maccaferri Indonesia, often found in PDFs, specify material quantities. A well-prepared checklist ensures a smooth installation process, preventing delays and ensuring you have everything required for a secure and lasting fence.
Step-by-Step Installation Process
PDF guides detail a six-step process: marking boundaries, excavating holes, installing posts, attaching fabric, tensioning, and finally, gate installation for a secure fence.
Step 1: Marking Post Locations
Begin by precisely defining your property line, utilizing readily available resources for accurate demarcation. PDF guides recommend using stones and durable rope to clearly visualize the fence’s intended path. This initial step is crucial for avoiding disputes and ensuring compliance with local regulations.
Carefully measure and mark the locations for each fence post, considering the recommended post spacing detailed in the installation specifications. Accurate marking prevents future adjustments and ensures a structurally sound fence. Double-check all measurements before proceeding to the next phase – excavation – to guarantee alignment and a professional finish.
Step 2: Excavating Post Holes (Depth & Diameter)
Following marked locations, excavate post holes with a minimum depth of 2 feet, as outlined in the PDF installation guides. The diameter of the hole should accommodate the post and surrounding concrete, ensuring stability. Proper depth is vital for frost heave prevention and overall fence integrity.
Ensure consistent hole dimensions for uniform post setting. Guides emphasize that adequate concrete encasement is crucial for resisting wind loads and maintaining fence alignment. Consider soil conditions; looser soil may require wider or deeper holes for enhanced support. Precise excavation sets the foundation for a durable, long-lasting chain link fence.
Step 3: Setting the Terminal Posts
According to the PDF installation guides, terminal posts—corner, end, and gate posts—require meticulous setting. Position posts in the excavated holes, ensuring they are plumb using a level. Carefully pour concrete around the posts, filling the hole to a sufficient level for robust support.
Proper concrete curing is essential; allow adequate time for full strength development before proceeding. Guides detail the importance of bracing the posts during the curing process to maintain alignment. These posts bear the brunt of tension, so secure setting is paramount for a stable and long-lasting fence structure.
Step 4: Setting the Line Posts
The PDF guides emphasize consistent spacing when setting line posts, typically dictated by post spacing specifications; Excavate holes as planned, ensuring correct depth and diameter. Position each line post plumb within its hole, utilizing a level for accuracy.
Backfill with concrete, similar to terminal posts, but potentially with adjusted concrete volume based on soil conditions. Bracing is recommended during concrete curing to prevent shifting. Line posts provide intermediate support, and their proper alignment is crucial for a taut and visually appealing chain link fence installation.
Installing the Framework
PDF resources detail attaching the top rail and installing tension wire, vital components for framework stability and supporting the chain link fabric’s tension.
Step 5: Attaching Top Rail
According to available PDF guides, securely attaching the top rail is crucial for a robust chain link fence. This involves connecting the rail to the terminal and line posts using appropriate hardware, like tension bands and brace bands.
Ensure the top rail sections are properly aligned and level, creating a consistent support structure for the fabric. The guides emphasize using galvanized or PVC-coated rails to resist corrosion.
Properly installed top rails contribute significantly to the fence’s overall stability and longevity, preventing sagging and maintaining tension. Detailed schematics within the PDF illustrate correct attachment methods.
Step 6: Installing Tension Wire
PDF installation guides highlight the importance of tension wire for a taut, professional-looking chain link fence. This wire, typically installed at the top and bottom of the fabric, absorbs tension and prevents sagging.
The process involves threading the tension wire through the fabric’s links and securing it to the terminal posts using tension bands.
Guides emphasize maintaining consistent tension throughout the wire’s length. Proper tensioning ensures the fabric remains secure and withstands external forces, contributing to the fence’s durability and aesthetic appeal. Diagrams within the PDF illustrate correct wire routing.

Hanging the Chain Link Fabric
PDF guides detail attaching the chain link fabric to posts using tie wires, ensuring proper vertical alignment and secure fastening for a durable fence.
Step 7: Attaching the Chain Link Fabric to Posts
Detailed PDF installation guides emphasize using galvanized steel tie wires to securely attach the chain link fabric to both line and terminal posts. These guides illustrate proper tie wire placement, typically spaced every 12-18 inches along both the top and bottom of the fabric.
Crucially, the PDF resources highlight the importance of twisting the tie wires tightly around both the fabric’s diamond pattern and the post’s framework. This ensures a strong, lasting connection, preventing sagging and maintaining the fence’s structural integrity. Diagrams within the PDFs clearly demonstrate the correct wrapping and twisting techniques for optimal results.
Step 8: Tensioning the Chain Link Fabric
PDF guides detail utilizing a chain link stretcher – a specialized tool – to achieve proper fabric tension. The documents emphasize stretching the fabric taut, but not excessively, to avoid damage. Initial stretching is done incrementally, alternating between sections of the fence.
Furthermore, the guides illustrate how to monitor tension using a chain link tension meter, ensuring consistent tightness across the entire fence length. Proper tension prevents sagging and maintains the fence’s security. Diagrams within the PDFs showcase the correct stretcher placement and operation for optimal fabric tensioning.

Gate Installation
PDF resources outline installing gate posts, hanging the gate securely, and precisely adjusting latches and hinges for smooth operation and lasting durability.
Step 9: Installing Gate Posts
According to available PDF guides, gate post installation mirrors terminal post setup, demanding precise alignment for smooth gate function. Excavate holes at least 2 feet deep, ensuring adequate concrete support. Maccaferri Indonesia product details emphasize using concrete posts for stability.
Proper post spacing is crucial, dictated by gate width and hardware requirements. Verify posts are plumb using a level during concrete setting. Allow sufficient curing time before proceeding to avoid shifting. The PDF resources highlight the importance of robust gate post foundations to withstand repeated use and potential impacts, ensuring long-term fence integrity.
Step 10: Hanging the Gate
PDF installation guides detail that carefully lifting and positioning the gate within the posts is paramount. Attach hinges to both the gate and the gate posts, ensuring proper alignment for smooth swinging action. Maccaferri Indonesia documentation doesn’t specifically detail this step, but emphasizes overall structural integrity.
Use appropriate hardware, often included in gate kits, and follow manufacturer instructions. Verify the gate swings freely and doesn’t bind. Initial adjustments are crucial for optimal operation. The guides suggest temporarily supporting the gate during hinge attachment to prevent strain and ensure accurate placement.
Step 11: Adjusting Gate Latches & Hinges
PDF guides emphasize fine-tuning gate latches and hinges for secure closure and effortless operation. Adjust hinge placement to eliminate sagging or binding, ensuring a level gate swing. Precise latch adjustments are vital for preventing accidental openings, enhancing security. Maccaferri Indonesia product details focus on robust construction, implying durable hardware requiring minimal adjustment.
Test the latch thoroughly, making incremental changes until a firm, reliable catch is achieved. Check for smooth movement throughout the gate’s arc. Properly adjusted hinges minimize stress on the gate frame, prolonging its lifespan.
Finishing Touches & Considerations
PDF resources detail adding caps, accessories, and crucial grounding for electrical safety, alongside long-term post maintenance and potential repair strategies.
Step 12: Adding Fence Caps & Accessories
Completing your chain link fence involves more than just fabric and posts. PDF guides emphasize the importance of fence caps, providing a finished look and protecting post tops from weather damage.
Consider adding accessories like rail ends, tension bands, and brace bands for enhanced stability and aesthetics. These components, detailed in installation PDFs, secure the framework and prevent loosening over time.
Furthermore, explore options like privacy slats woven into the chain link, offering increased seclusion. Proper accessory installation, as outlined in the guides, ensures a secure and visually appealing fence.
Step 13: Grounding the Fence (Electrical Safety)
Crucially, some PDF installation guides highlight the need for grounding metal chain link fences, particularly in areas prone to lightning strikes. This safety measure minimizes the risk of electrical shock and potential damage.
Grounding typically involves connecting a heavy-gauge copper wire to the fence framework and burying it deep into the earth, creating a path for electricity to safely dissipate.
Consult local electrical codes and the fence installation PDF for specific grounding requirements in your region, ensuring compliance and maximizing safety for people and property.
Step 14: Post Maintenance & Repair
Comprehensive chain link fence PDF guides often address long-term maintenance. Regular inspections are vital to identify and address issues like leaning posts or damaged fabric. Repairing or replacing damaged posts promptly prevents further deterioration and maintains fence integrity.
Rust prevention, especially on galvanized or non-coated components, is key. Applying protective coatings or paints extends the fence’s lifespan. The PDF may detail specific repair techniques for common problems, ensuring a durable and secure perimeter.

Troubleshooting Common Issues
PDF guides detail solutions for uneven ground and fabric sagging, offering practical advice to rectify installation challenges and ensure a secure fence.
Step 15: Dealing with Uneven Ground
Navigating terrain variations is crucial for a professional chain link fence installation. PDF guides emphasize marking the boundary with stones and rope to visualize the fence line across slopes. Instead of attempting to maintain a consistent fence height, follow the natural ground contour.
This approach minimizes digging and post height discrepancies. Alternatively, consider stepping the fence – adjusting post heights incrementally to create a terraced effect. Ensure each section remains taut and secure, compensating for height changes with fabric tensioning. Proper planning and adaptable techniques, detailed in installation resources, guarantee a stable and aesthetically pleasing fence even on challenging landscapes.
Step 16: Addressing Fabric Sagging
Chain link fabric sagging is a common issue, often stemming from insufficient tension during installation. PDF guides highlight the importance of properly tensioning the fabric using a chain link stretcher. Ensure the tension wire is securely fastened and evenly distributes force along the fence line.
Regular inspections are vital; re-tensioning may be necessary over time due to fabric stretch or ground settling. Consider using heavier gauge fabric for longer spans to minimize sagging. Proper post spacing, as detailed in specifications, also contributes to stability. Addressing sagging promptly prevents further strain and maintains fence integrity.

Chain Link Fence Specifications & Details
PDF documents detail heavy galvanized and PVC-coated chain link fencing products, including post spacing, wire gauge, and mesh size for optimal installation.
Step 17: Understanding Post Spacing
Optimal post spacing is crucial for a structurally sound chain link fence. PDF resources emphasize that consistent spacing ensures even tension distribution across the fabric. Typically, line posts are spaced between 8 and 10 feet apart, dictated by the fence height and gauge of the chain link fabric.
Terminal and corner posts require more robust setting due to increased tension. Maccaferri Indonesia product details, found in associated PDFs, highlight the importance of proper post depth and concrete encasement to resist leaning or failure. Accurate post spacing minimizes fabric sagging and extends the fence’s lifespan, contributing to a professional and durable installation.
Step 18: Wire Gauge and Mesh Size
Chain link fabric is categorized by gauge – the thickness of the wire – and mesh size, defining the diamond opening. PDF guides detail that common gauges range from 9 to 11.5, with lower numbers indicating thicker, more durable wire. Maccaferri Indonesia PDFs showcase heavy galvanized and PVC-coated options.
Mesh size, typically 1 1/4″, 1 1/2″, or 2″, impacts security and aesthetics. Smaller mesh provides greater security. Selecting the appropriate gauge and mesh depends on the intended use – residential, commercial, or security – as outlined in installation PDF resources.
PDF Resources & Further Information
Access comprehensive PDF guides for chain link installation, including detailed specifications from Maccaferri Indonesia, and step-by-step instructions for DIY projects.
Step 19: Accessing Chain Link Fence Installation PDFs
Numerous online resources offer downloadable PDF guides for chain link fence installation. A comprehensive 67-page guide provides detailed instructions, covering everything from initial planning to final adjustments. These resources often include diagrams and schematics, simplifying the process for both beginners and experienced DIYers.
Furthermore, manufacturers like Maccaferri Indonesia provide PDF documentation outlining their specific fencing products, including installation guidelines for concrete posts, struts, and the chain link fabric itself. Searching online for “chain link fence installation guide PDF” will yield a variety of options, allowing you to select the resource best suited to your project’s needs.
Step 20: Maccaferri Indonesia Product Details
PT. Maccaferri Indonesia offers detailed documentation, available in PDF format, concerning their heavy galvanized and PVC coated chain link fencing products. This includes specific instructions for installing components like concrete posts and struts, crucial for a durable and secure fence.
The documentation outlines a 7-step process, encompassing excavating post holes, installing concrete elements, and correctly attaching the chain link fabric between posts. These resources are invaluable for those utilizing Maccaferri products, ensuring adherence to their recommended installation procedures for optimal performance and longevity of the fencing system.
Global Configuration & Administration
Access fence settings through the Administration and Configure sections, allowing customization of various parameters within the system’s global configuration interface.
Step 21: Configuring Fence Settings
Navigate to the Administration panel and select Configure to access the fence settings. This crucial step allows for tailored adjustments to your chain link fence system. Within this configuration window, you can modify parameters relating to fence height, fabric gauge, post spacing, and gate functionalities.
Ensure all settings align with your initial planning and local regulations. Properly configured settings optimize fence performance and longevity. Review documentation, like the chain link fence installation guide PDF, for specific setting recommendations. Carefully consider each option before saving changes, as incorrect settings may require re-configuration.

Translation Resources for Fence Terminology
Access an English-Russian dictionary and translation system for millions of English translations, aiding comprehension of fence terms and the installation guide PDF.
Step 22: English-Russian Fence Translation
Navigating the chain link fence installation process often requires understanding terminology across languages, particularly when collaborating with international teams or referencing translated documentation; Utilize comprehensive English-Russian dictionaries and online translation systems to accurately interpret the chain link fence installation guide PDF.
These resources provide access to millions of translated terms, ensuring clarity when dealing with specific components like posts, fabric, tension wire, and gate hardware. Accurate translation is crucial for safety, proper installation, and avoiding misunderstandings during the project. Explore these tools to bridge the language gap and successfully implement your fencing project.
Safety Precautions During Installation
Prioritize personal protective equipment (PPE) throughout the chain link fence installation, referencing the guide PDF for detailed safety instructions and hazard awareness.
Step 23: Personal Protective Equipment (PPE)
Ensuring your safety during chain link fence installation is paramount. Consult the comprehensive installation guide PDF for a detailed list of recommended Personal Protective Equipment (PPE). Essential items include sturdy work gloves to protect hands from sharp edges of the chain link fabric and posts. Safety glasses or goggles are crucial to shield your eyes from flying debris during digging and cutting.
Wear appropriate footwear, such as work boots, offering ankle support and protection against accidental impacts. Consider a hard hat, especially when working near overhead power lines or in areas with potential falling objects. Long sleeves and pants can provide additional skin protection. Always prioritize safety and refer to the PDF for specific recommendations based on the task at hand.